Did you know that approximately 52% of American adults over the age of 50 have low bone mass at the femoral neck or lumbar spine? As we age, our bones naturally lose density, increasing the risk of fractures and breaks. But there’s good news – research shows that high-impact exercises, particularly plyometrics, can significantly improve bone mineral density and overall skeletal health.
Plyometric exercises – those quick, explosive movements that make you jump, hop, and bound – create forces that stimulate bone remodeling far more effectively than traditional weight-bearing activities. In this comprehensive guide, we’ll explore the science behind plyometrics for bone health and share the most effective exercises to strengthen your skeletal system naturally.
The Science Behind Plyometrics and Bone Density
Bones respond to mechanical loading by adapting their structure to withstand greater forces. This process, known as Wolff’s Law, explains why weight-bearing exercise strengthens bones. However, not all exercises create equal bone-building benefits.
Research published in the journal “Endocrinology and Metabolism” shows that high-impact, dynamic movements like plyometrics increase the activity of osteoblasts – the cells responsible for depositing and mineralizing new bone tissue. The greater the force applied to bone, the stronger the remodeling response.
What makes plyometrics particularly effective is the rate and magnitude of loading. When you land from a jump, your bones experience forces 3-5 times your body weight. This high-impact stimulus triggers a cascade of cellular responses that ultimately strengthen bone architecture.
One study found that women who performed jumping exercises just 10-20 times twice daily improved hip bone mineral density by 0.5% after 16 weeks – while the control group lost bone density during the same period. This demonstrates how even small doses of plyometric training can make a significant difference.
Unsure About Your Bone Health Status?
Take our free bone health assessment to determine your risk factors and receive personalized recommendations for improving your bone density through targeted exercise.
Safety First: Preparing for Plyometric Training
Before diving into plyometric exercises, it’s essential to establish proper foundations. These high-impact movements create significant forces through your skeletal system, joints, and connective tissues. Taking the right precautions will maximize benefits while minimizing injury risk.

Essential Preparation Steps
- Consult your healthcare provider before starting, especially if you have osteopenia, osteoporosis, or previous bone injuries
- Begin with a 5-10 minute dynamic warm-up to increase blood flow and prepare joints
- Start with lower-impact exercises and gradually progress to higher-impact movements
- Choose appropriate surfaces – a wooden floor with some give is ideal; avoid concrete
- Wear supportive athletic shoes with proper cushioning
Who Should Modify or Avoid Plyometrics
- Those with severe osteoporosis (T-score below -2.5)
- People with acute bone injuries or stress fractures
- Individuals with uncontrolled high blood pressure or heart conditions
- Those with severe joint problems, especially in the knees, hips, or ankles
- Anyone experiencing acute pain during exercise
Important Safety Note: If you have diagnosed low bone density, work with a qualified fitness professional or physical therapist to develop a safe, progressive program tailored to your specific needs.
8 Powerful Plyometric Exercises for Maximum Bone Density
The following exercises are arranged in progressive order from beginner to advanced. Start with the first few exercises and gradually work your way up as your strength, coordination, and confidence improve. For each exercise, we’ve included target bone areas, detailed instructions, and modifications for different fitness levels.
1. Ankle Hops

Target bone areas: Lower legs, ankles, feet
How to perform:
- Stand with feet hip-width apart, knees slightly bent
- Keep your core engaged and posture tall
- Hop up and down using only your ankle joints (minimal knee bend)
- Land softly on the balls of your feet, then immediately hop again
- Perform 2 sets of 10 repetitions, resting 1-2 minutes between sets
Modifications:
- Beginner: Hold onto a stable surface for balance
- Advanced: Increase repetitions to 20 per set or add small ankle weights
2. Squat Jumps

Target bone areas: Hips, spine, legs
How to perform:
- Stand with feet shoulder-width apart
- Lower into a squat position, hips back and chest up
- Explosively jump straight up, extending through hips, knees, and ankles
- Land softly by bending at the knees and hips (imagine sitting back into a chair)
- Immediately lower back to squat position
- Perform 2-3 sets of 8-10 repetitions
Modifications:
- Beginner: Perform partial squats with smaller jumps
- Intermediate: Full squat jumps with moderate height
- Advanced: Add a weighted vest (5-10% of body weight)
3. Lateral Line Hops

Target bone areas: Hips, legs, ankles
How to perform:
- Stand with feet together beside an imaginary line on the floor
- Hop sideways over the line, landing softly on both feet
- Immediately hop back to the starting position
- Maintain an upright posture throughout the movement
- Perform 2-3 sets of 10-15 hops in each direction
Modifications:
- Beginner: Step sideways instead of hopping, gradually introducing small hops
- Advanced: Progress to single-leg lateral hops for greater challenge
4. Box Jumps

Target bone areas: Spine, hips, legs
How to perform:
- Stand facing a sturdy box or platform (6-12 inches high for beginners)
- Lower into a quarter squat position
- Swing arms back, then forward as you jump onto the box
- Land softly with both feet completely on the box, knees slightly bent
- Step down carefully (one foot at a time) rather than jumping down
- Perform 2-3 sets of 8-10 repetitions
Modifications:
- Beginner: Use a lower step or platform (4-6 inches)
- Intermediate: Medium height box (8-12 inches)
- Advanced: Higher box (12-18 inches) or add a weighted vest
“The key to plyometric training for bone health is consistency and proper progression. Start with lower-impact exercises and gradually increase intensity as your body adapts. Even small doses of plyometric training can yield significant improvements in bone mineral density over time.”
5. Split Jumps (Jumping Lunges)

Target bone areas: Hips, legs, spine
How to perform:
- Start in a split stance with one foot forward and one back (lunge position)
- Lower into a lunge, keeping front knee over ankle
- Explosively jump up, switching leg positions in mid-air
- Land softly in a lunge position with opposite leg forward
- Continue alternating legs with each jump
- Perform 2-3 sets of 8-10 repetitions per leg
Modifications:
- Beginner: Perform alternating lunges without the jump
- Intermediate: Low-height split jumps with controlled landings
- Advanced: Full split jumps with greater height
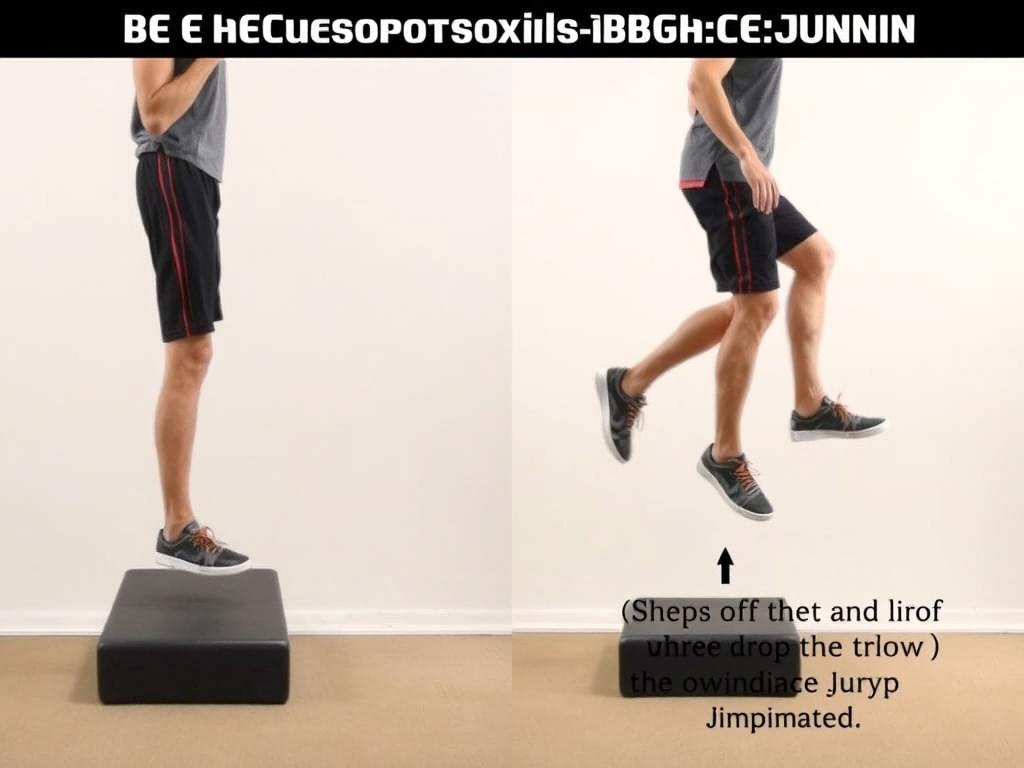
6. Depth Jumps

Target bone areas: Spine, hips, legs, feet
How to perform:
- Stand on a sturdy box or platform (12-18 inches high)
- Step off (don’t jump) and drop to the ground
- As soon as your feet contact the ground, immediately jump upward
- Land softly with knees bent to absorb impact
- Perform 2-3 sets of 6-8 repetitions with full recovery between reps
Modifications:
- Beginner: Not recommended – master other exercises first
- Intermediate: Use a lower box (6-8 inches)
- Advanced: Higher box (12-18 inches) with more explosive vertical jump
Caution: Depth jumps are an advanced plyometric exercise. Only attempt after mastering basic plyometric movements and ensure proper landing technique to minimize injury risk.
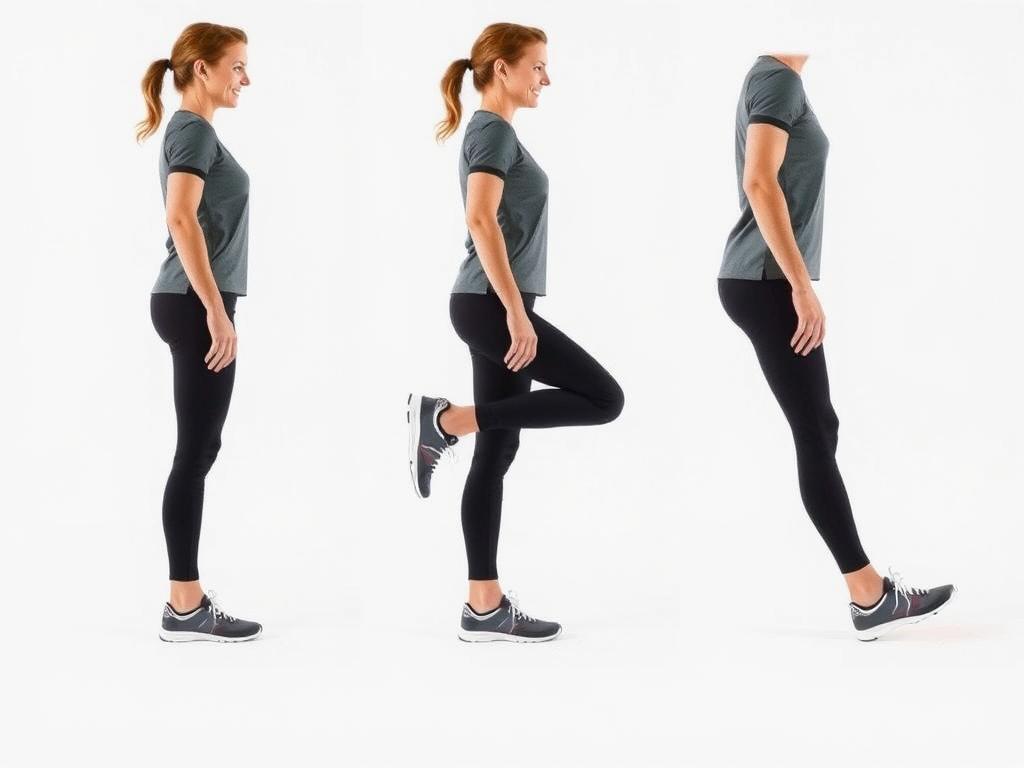
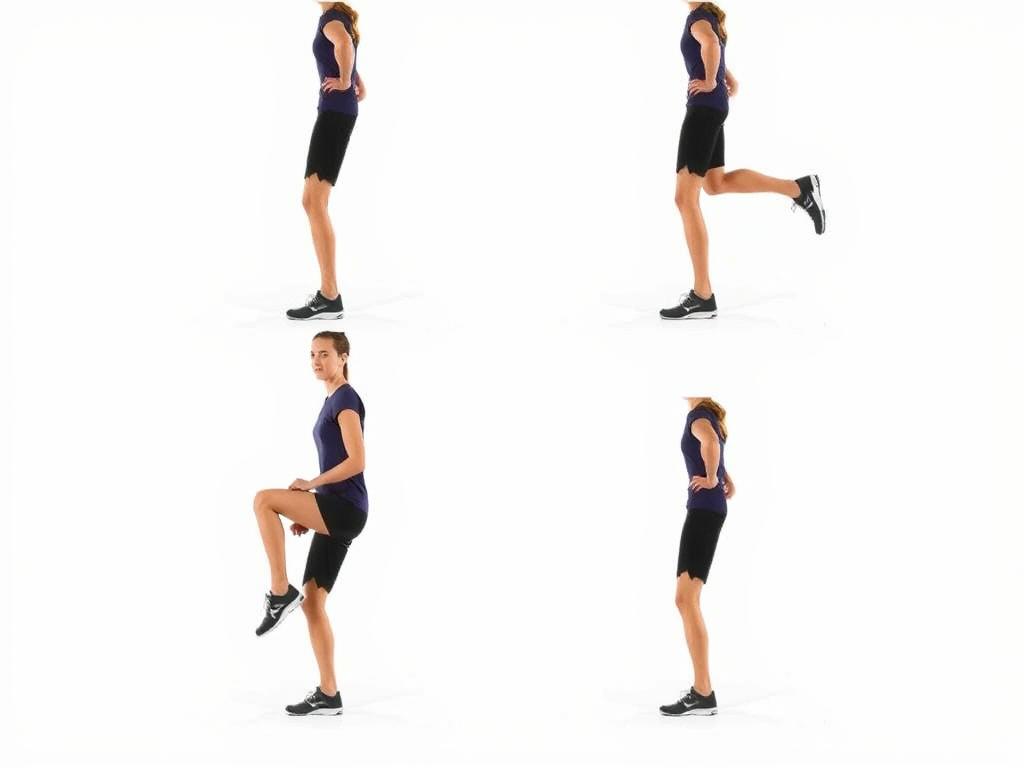
7. Single-Leg Hops

Target bone areas: Hips, legs, feet (with increased load due to single-leg support)
How to perform:
- Stand on one leg with a slight bend in the knee
- Hop forward, maintaining balance on the same leg
- Land softly by bending at the hip and knee
- Stabilize before the next hop
- Perform 2 sets of 8-10 hops on each leg
Modifications:
- Beginner: Hop in place while holding onto a support
- Intermediate: Forward hops with brief balance between each hop
- Advanced: Continuous forward hops or multi-directional patterns
8. 4-Square Single-Leg Hops

Target bone areas: Hips, legs, feet, with multi-directional loading
How to perform:
- Visualize a square pattern on the floor
- Stand on one leg at one corner of the square
- Hop to each corner of the square in sequence (forward, sideways, backward, sideways)
- Maintain balance on the same leg throughout the pattern
- Complete 2 sets of 2-4 rotations around the square on each leg
Modifications:
- Beginner: Practice stationary balance on one leg first
- Intermediate: Perform with pauses between each hop
- Advanced: Continuous movement with smaller square or faster pace
Progressive Loading Tip: For all exercises, you can increase bone-building stimulus by: 1) Adding more repetitions, 2) Increasing jump height/distance, 3) Adding a weighted vest (5-10% of body weight), or 4) Reducing rest periods between sets.
Scientific Evidence: Why Plyometrics Outperform Other Exercises
Multiple studies have demonstrated the superior bone-building effects of plyometric exercises compared to traditional weight-bearing activities. Here’s what the research shows:

Research Highlights
- A study in the Journal of Bone and Mineral Research found that high-impact jumping exercises increased bone mineral density in the hip and spine by 1.6% over 6 months, while walking produced no significant changes
- Research from the University of Missouri showed that 10-20 jumps twice daily improved hip bone mineral density in premenopausal women after just 16 weeks
- A meta-analysis in Osteoporosis International concluded that exercises generating ground reaction forces greater than 3.5 times body weight (typical of plyometrics) produced the greatest improvements in bone mineral density
Why Plyometrics Work Better
- Higher magnitude of force (3-5 times body weight vs. 1-2 times for walking)
- Faster rate of force application, which stimulates greater osteoblast activity
- Multi-directional loading that strengthens bone architecture in multiple planes
- Brief but intense stimulus that avoids the diminishing returns seen with prolonged, repetitive activities
The research is clear: while any weight-bearing exercise is beneficial for bone health, plyometric training provides superior stimulus for bone formation and density improvement. Even more encouraging, studies show that relatively small doses of plyometric exercise (10-20 jumps, twice daily) can yield significant benefits.
Implementation Guidelines: Building Your Bone-Boosting Routine
To maximize bone density benefits while minimizing injury risk, follow these evidence-based guidelines for implementing plyometric exercises into your routine:
Frequency
- Aim for 2-3 plyometric sessions per week
- Allow 48 hours between sessions for recovery
- Consistency is key – research shows benefits after 6-8 months of regular training
Volume
- Beginners: 40-60 total jumps per session
- Intermediate: 60-80 total jumps per session
- Advanced: 80-120 total jumps per session
- Quality over quantity – proper form is essential
Progression
- Start with basic exercises for 4-6 weeks
- Gradually increase complexity and intensity
- Progress by adding repetitions before increasing impact intensity
- Consider using a weighted vest (5-10% of body weight) after mastering bodyweight exercises

Remember that bone remodeling is a slow process. One complete cycle of bone resorption, formation, and mineralization takes 3-4 months. Therefore, consistency over time is crucial – expect to see measurable improvements in bone mineral density after 6-8 months of regular training.
Need a Personalized Bone-Building Exercise Plan?
Our certified exercise physiologists specialize in creating customized plyometric programs for individuals of all ages and fitness levels. Get a plan tailored to your specific bone health needs, fitness level, and goals.
Frequently Asked Questions About Plyometrics for Bone Density
How often should I do plyometrics for bone benefits?
Research suggests that 2-3 sessions per week is optimal for bone health benefits. Some studies have shown improvements with as little as 10-20 jumps performed twice daily. The key is consistency over time – bone remodeling is a slow process that requires regular stimulation. Allow 48 hours between high-impact sessions for recovery, but aim to maintain a consistent schedule over months, not just weeks.
Can older adults safely perform these exercises?
Yes, with proper modifications and progression. Many older adults can safely perform modified plyometric exercises, starting with the most basic movements like ankle hops or small squat jumps. The key is to begin with low-impact variations and progress gradually. Those with diagnosed osteoporosis should consult with their healthcare provider and work with a qualified fitness professional to develop a safe program. Focus on proper landing technique and use support (like a chair or wall) when needed.
Do weighted vests enhance bone density gains?
Yes, research indicates that weighted vests can enhance the bone-building stimulus of plyometric exercises. A weighted vest adds additional load to the skeletal system, increasing the ground reaction forces that stimulate bone formation. Start with a light vest (5% of body weight) and gradually progress to no more than 10-15% of body weight. However, weighted vests should only be introduced after mastering proper form with bodyweight exercises, and they’re not recommended for those with severe osteoporosis or balance issues.
How long before I see improvements in bone density?
Bone remodeling is a slow process. One complete cycle of bone resorption, formation, and mineralization takes 3-4 months. Most research studies show measurable improvements in bone mineral density after 6-8 months of consistent training. However, the functional benefits (improved strength, balance, and reduced fall risk) often appear much sooner. Commit to a long-term approach and remember that preventing bone loss is just as important as increasing density.
Are plyometrics safe for people with osteopenia or osteoporosis?
It depends on the severity and individual factors. Those with mild osteopenia can often safely perform modified plyometric exercises, starting with the lowest impact variations. People with osteoporosis, especially those with T-scores below -2.5 or previous fractures, should consult with their healthcare provider before attempting plyometrics. In many cases, a progressive program that begins with strength training and gradually introduces very low-impact plyometrics can be beneficial, but this should be supervised by a qualified professional.
Conclusion: Your Path to Stronger Bones
Plyometric exercises offer a powerful, evidence-based approach to improving bone density and overall skeletal health. By incorporating these high-impact movements into your regular fitness routine, you can stimulate the bone-building process far more effectively than with traditional weight-bearing activities alone.
Remember that consistency is key – bone remodeling takes time, and the greatest benefits come from sustained, progressive training over months and years. Start with the beginner-level exercises, focus on proper form and landing mechanics, and gradually increase intensity as your strength and confidence improve.
Whether you’re looking to build bone density in your youth, maintain it through middle age, or minimize loss in your later years, plyometric training can be adapted to meet your needs. By investing just a few minutes several times per week in these simple jumping exercises, you’re making a significant investment in your long-term skeletal health and overall quality of life.
Ready to Build Stronger Bones?
Download our complete guide to plyometric training for bone health, including detailed exercise instructions, progressive 12-week program templates, and nutrition recommendations to support optimal bone density.


0 Comments